
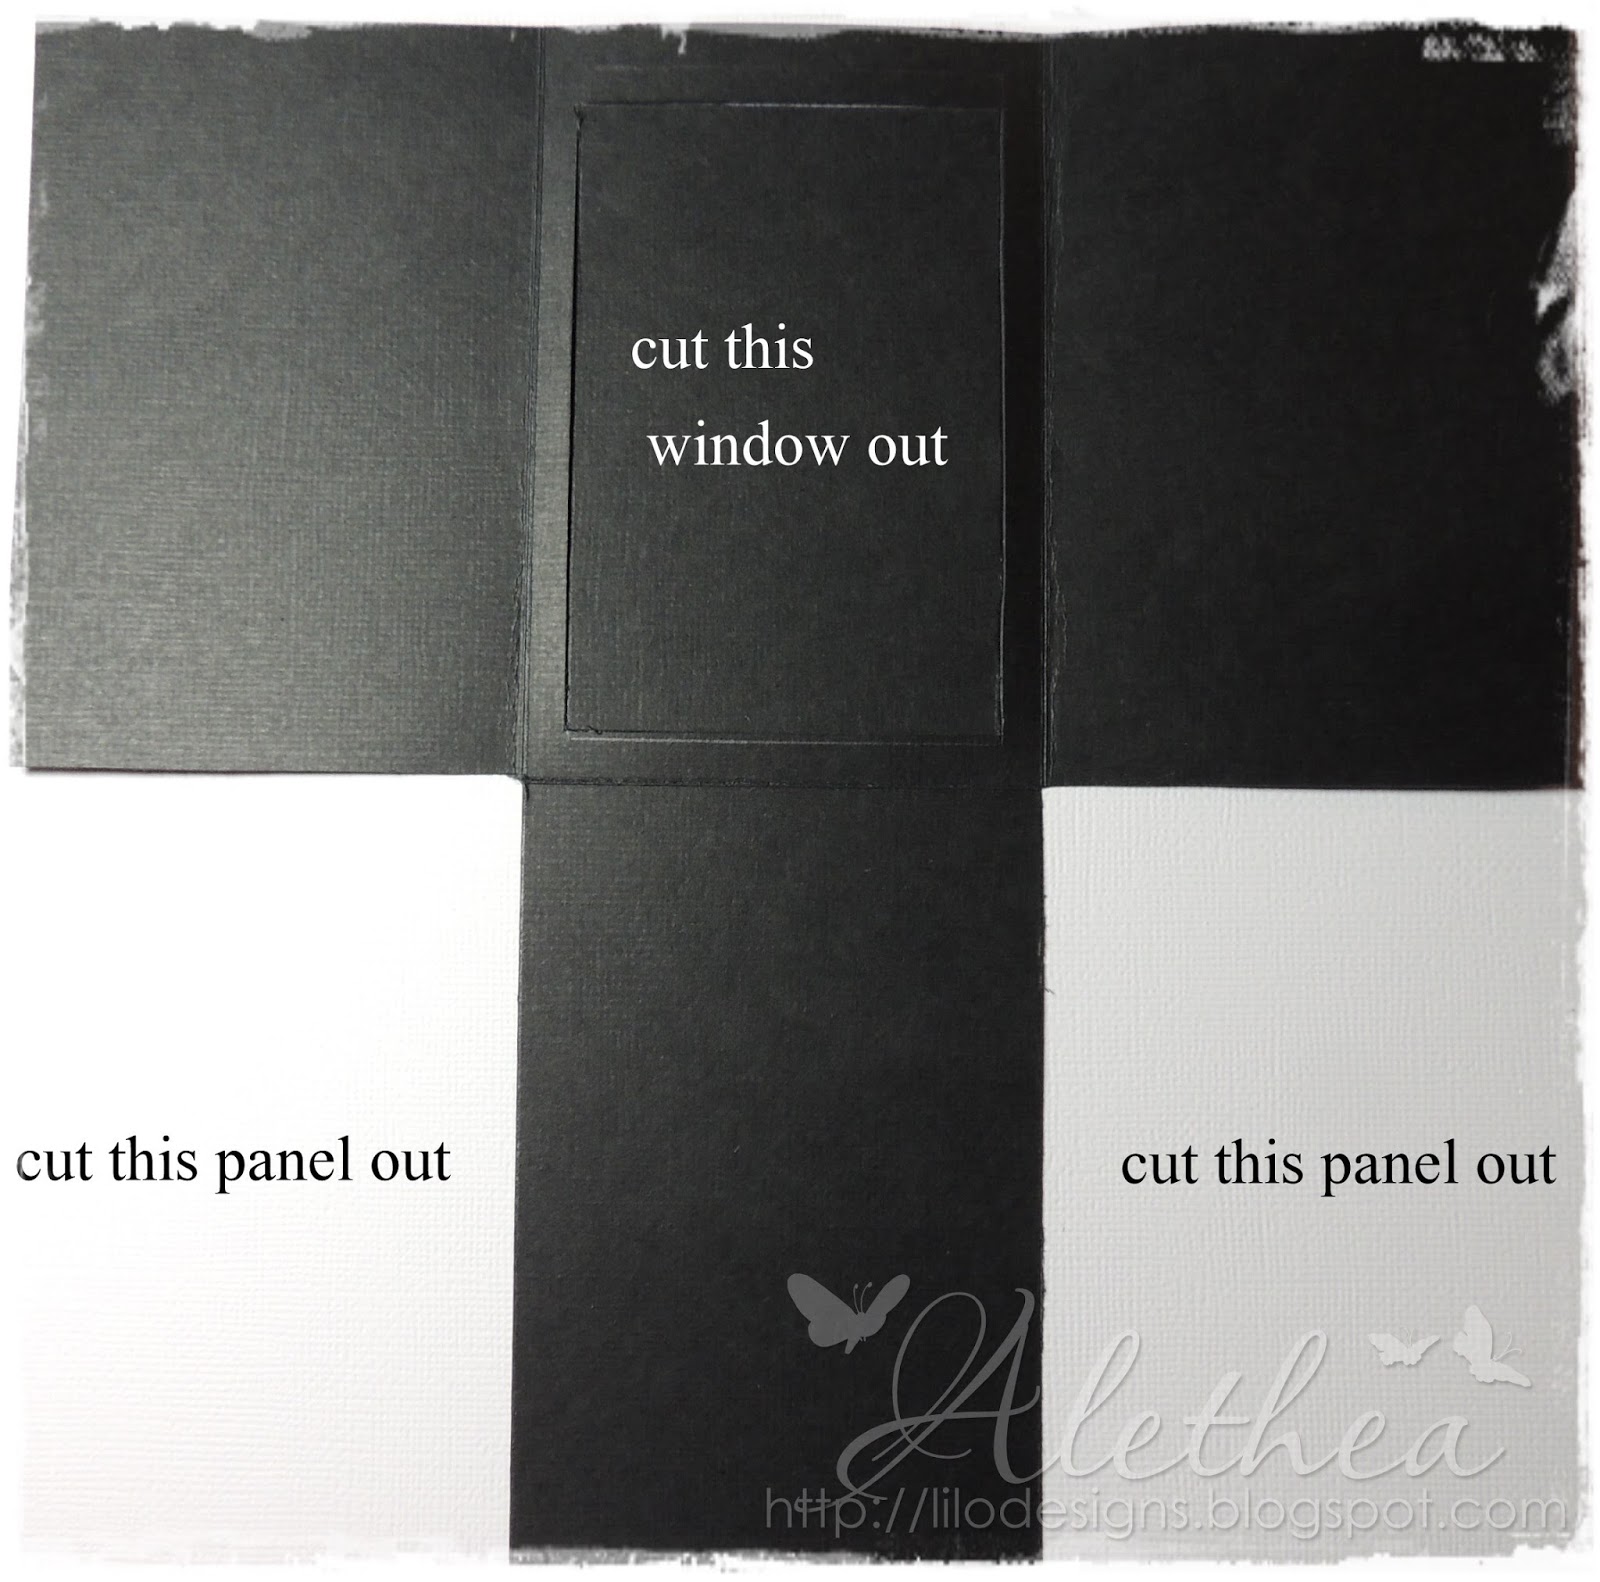
I started with a 9 x 9 piece of card stock which I folded in half one way and the thirds the other way! So you have 6 boxes. You then cut out the bottom left and right panels as you don't need these! In the middle panel at the top you cut out a window, leaving a border as big as you require.

Print out your image on acetate! Now my recommendation is that you actually stamp an image onto the acetate with Staz On ink as the ink takes a few days to dry using a digi image! but it does dry so if you do want to use a digi then do it a few days before you want to make your card! I used a the pirate ship digi from the Bonbon Belles cd collection

Then print your coloured image onto cardstock or you can colour your own image! The pre-coloured pirate ship is also from the Bonbon Belles cd collection. Once you have done that line the acetate picture up with the coloured pic then cut them out so that they are slightly smaller to your slider card but leave some feet at the end (you will see why later)

Back to your black card, I cut about 1/2 an inch from the flap (below the window section of your card then added a piece of white card stock onto it. This is the flap that will be behind the image on the acetate.

Fold the flap in then either side of the card stick down and you are left with a pocket. At the open end of the pocket punch a half circle on the front window.

Get your images and slide them into the pocket with the acetate on top on the white flap and the coloured image behind it. Push them right in, making sure the top is level with the top of the slider. If it's nnot trip it so that it is. If it is, then slightly pull the images out punch a 1 inch circle fold it over the end of the images, punch a hole and attach an eyelet. This will hold the acetate image and the coloured image together! Push it back in , then punch two holes on either side, making sure you don't punch a hole in the image.

To finish off, attach eyelets into the punched holes.

As an easier way to pull out the slider I added some twine and an anchor charm!

I then attached the slider to a piece of white card stock, inked around the edge and decorated the card using pre-coloured images from the Bonbon Belles cd collection. I went over the coins in the treasure chest with a gold glitter pen!

TA-DA - Magic!!!
I hope that you could follow along. If you have any questions then feel free to contact me via my blog.
Gorgeous tutorial and so fab to see it step by step. Take care Zo xx
ReplyDeleteWOW - this is fab and magical :-)
ReplyDelete